This is the actual shop at The Furance. The Furance offers glass blowing in an glory hole, lampworking, stain glass classes, and slumping or fusing classes, plus the neon shop.
 This is how the glass tubing is shipped and stored at the shop. They all look pretty much the same, but as you will see in a minute - they aren't! The glass tubes come in different mm sizes, colors and types (depending if you are going to pump neon or argon in them).
 THIS, is how you tell what color you are picking. THIS, is also one of B's favorite parts. Who wouldn't love to get to play with a black light? When you illuminate the ends of the tubes with a black light, you can tell what color the tubing will be once the 'filling process' is done and the electricity is hooked to your piece of work.
 It's important to pick the right color now, because you don't know for sure until the end of the project - and if you spend all the time bending, blowing, filling and then plug it in and find your UofM letters are in green - well you have to start again :-)
 ribbon torch
 cross fire torch
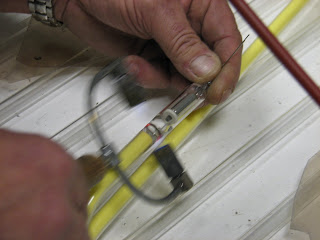
 heating the electrode
 butt welding the electrode into place, which seals the tube
 Unfortunately a step is missing here - which is the actual heating, bending and blowing of the tubes. Which is really the 'art' part of this technique. We might get those pics another day and I can update. sorry
electrode being attached with a hand torch
 pumping station, where either the neon or argon is pumped into the sealed piece
 gadgets and gadges galore!!!
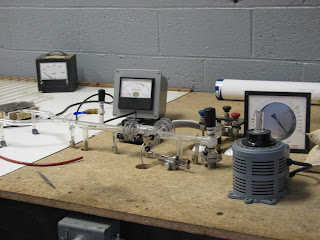 Piece hooked to the station, just about ready to be pumped. This piece is completely sealed and has been butt welded to the station (that is actually what Bob is doing in this pic). This is where a lot of science comes in. All of which B understands, but I am left clueless.
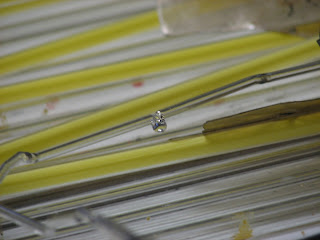
 A drop of mercury is added to a small bubble (which is blown into the tubing before it is hooked to the pumping station. This mercury is eventually "dropped" and "walked" around in the piece (more on that in a bit).
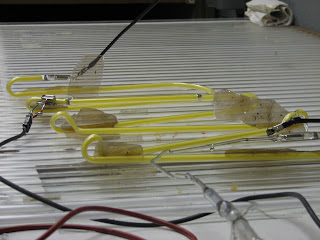
 Then when everything is hooked up, and each bend is protected with mica between the glass tubing (so the electricity can not arc between the bends), then the piece is heated and pumped with the gas.
 Once the piece has cooled, after being pumped, it is taken off the pumping station. Then that drop of mercury is 'dropped,' which means it is shaken out of the bubble and the mercury is 'walked' around the piece - which means you turn the piece in your hands until the mercury has been totally dispersed inside the entire piece of art. Then the piece is hooked to a transformer via the electrodes. When electricty is first sent through the tubing it is white, but as it heats up.......................
 ....your piece takes on the color, hopefully, that you wanted and chose at the beginning.
 The art part and the science part are a little more complicated than I have depicted here, but you get the idea. And I am sure I have missed some important details. But it is late and this teacher/mom has had it for the brainwork side of things.
 pumping station, where either the neon or argon is pumped into the sealed piece
 gadgets and gadges galore!!!
 Piece hooked to the station, just about ready to be pumped. This piece is completely sealed and has been butt welded to the station (that is actually what Bob is doing in this pic). This is where a lot of science comes in. All of which B understands, but I am left clueless.
 A drop of mercury is added to a small bubble (which is blown into the tubing before it is hooked to the pumping station. This mercury is eventually "dropped" and "walked" around in the piece (more on that in a bit).
 Then when everything is hooked up, and each bend is protected with mica between the glass tubing (so the electricity can not arc between the bends), then the piece is heated and pumped with the gas.
 Once the piece has cooled, after being pumped, it is taken off the pumping station. Then that drop of mercury is 'dropped,' which means it is shaken out of the bubble and the mercury is 'walked' around the piece - which means you turn the piece in your hands until the mercury has been totally dispersed inside the entire piece of art. Then the piece is hooked to a transformer via the electrodes. When electricty is first sent through the tubing it is white, but as it heats up.......................
 ....your piece takes on the color, hopefully, that you wanted and chose at the beginning.
 The art part and the science part are a little more complicated than I have depicted here, but you get the idea. And I am sure I have missed some important details. But it is late and this teacher/mom has had it for the brainwork side of things.
2 comments:
This is SOOOO cool. M is inspired to learn this art. Heck, me too! :)
HEY FELLA,S LOOKS LIKE YOUR HAVEN FUN WITH THE NEW GUYS...KEEP IT REAL..ALAN V.
Post a Comment